Getting started with DIY crafts is always exciting. It’s quite satisfying making something with your own two hands and watching your project take shape. But if you’re just dipping your toes into the world of crafting, it’s easy to make a few rookie mistakes; I’ve made more than my share. I’ll walk you through the most common mistakes new DIY crafters make and give some tips on how to sidestep them so your creative adventure is a lot smoother.
Biggest Mistakes Beginners Make in DIY Craft Projects
Jumping into a new craft is super rewarding, but there’s a learning curve. Many of the pitfalls crafters run into can be traced back to a few habits and choices, like skipping prep or getting a little too ambitious at first. Being aware of these popular DIY mistakes can make the process less stressful and a lot more fun. The global DIY market has grown in recent years; millions are joining the crafting movement for everything from home decor to handmade gifts. Starting strong helps you get more from the experience and keeps you motivated to continue. Having a basic understanding of what usually trips people up means you’re already a step ahead.
Crafters have come a long way since making macrame potholders in the ’70s. Today’s DIY world covers everything from woodworking and resin art to upcycled home decor. Whether you’re sewing, gluing, or painting, knowing the typical trouble spots really pays off.
Common DIY Crafting Mistakes (and Simple Fixes)
Tackling a creative project is a great way to relax or even make gifts that mean more. I’ve found that a few mistakes tend to pop up over and over, especially for people just starting out. Here’s a quick rundown, along with some tips that have saved me plenty of time and frustration:
- Not Reading Instructions Thoroughly: Missing out on steps can leave you scrambling. Take a couple of minutes to read through all the instructions before starting. It’s tempting to just get going, but a quick read-through is worth it.
- Using the Wrong Materials: Substituting supplies, like using regular glue instead of craft glue, can lead to disappointing results. If a tutorial calls for a specific type of product, use that item or try to get as close as possible.
- Neglecting Prep Work: Skipping prep, like sanding wood before painting or washing fabric, can make your finished project look messier than you’d like.
- Starting Off Too Complicated: Ambitious projects are fun, but picking something too involved when you’re still learning typically leads to frustration. Choose projects that match your current skill level, and take it up a notch as you gain confidence.
- Not Measuring Properly: Eyeballing measurements almost always spells trouble in DIY, especially for projects involving fabric, wood, or detailed patterns. Always measure and mark carefully.
- Not Allowing Enough Drying or Setting Time: Rushing to the next step before glue, paint, or finishes fully dry often results in smudges or pieces coming apart later on.
- Underestimating Clean-Up: Once creativity takes over, it’s easy to make a mess. Having wipes, a trash bin, or a drop cloth nearby will save your space, and your sanity, later on.
Step-by-Step Guide to Getting Your DIY Projects on Track
Putting some structure around your creative plans pays off. Here’s what I recommend for beginners looking for that satisfying, mistake-free finish:
- Pick a Realistic First Project: Go for something small, like a set of coasters, a decorative jar, or a simple tote bag. It should use basic tools and familiar materials.
- Check Your Supplies Ahead of Time: Double-check that you’ve got everything on the materials list before you start. Running back to the store mid-project isn’t much fun.
- Prepare Your Workspace: Find a place with good lighting, enough space to spread out, and some sort of protection for your table or floor.
- Follow Each Step; Don’t Skip: Even if parts of the instructions look repetitive or obvious, stick with them. This helps you get a feel for the process and saves fixing mistakes later.
- Practice Good Safety Habits: Always use protective gear, like gloves or goggles, if you’re using sharp tools, strong glues, or paints.
- Ask for Help When Needed: Online videos, craft forums, and in-person classes offer tons of support. There’s no shame in checking out a video or chatting with more experienced crafters.
- Give Yourself Time to Finish: Plan for breaks or overnight drying time, especially with paint or glue-heavy projects. It pays off for the final look to be neat and durable.
Getting into the habit of double-checking details as you go saves a ton of stress. Over time, you’ll recognize these steps by instinct.
What to Think About Before You Buy Craft Supplies
Jumping right in can be fun, but being thoughtful about your supply list and workspace saves a lot of money and headaches. Something I wish I’d learned sooner is that quality really does matter for some tools and supplies. Here are a few things worth considering:
- Quality of Materials: Bargain bin craft items can be great for experimenting, but stuff like paint, glue, and scissors are actually easier to work with (and safer) when you pay for decent quality.
- Tool Safety and Compatibility: Make sure your chosen materials are meant to go together. As examples, hot glue isn’t ideal for thin fabric and not all craft paints will work on plastic.
- Storage Space: Craft supplies pile up quickly. Have storage solutions in mind (drawers, bins, organizers) so things don’t get lost, ruined or wasting time rummaging through your supplies.
- Budget: Get a price estimate for your projects before shopping. Sometimes costs creep up with extras, so plan for a little wiggle room.
Prep and Workspace
Treat your workspace like you would a kitchen before cooking: clean and organized. A cluttered space means more accidents with spills, broken pieces, or lost tools. Setting up your crafting area can make each session feel like less of a hassle, and it lets you focus on actually creating.
Good Lighting
DIY relies heavily on detail. A bright, well-lit space lets you see true colors, cut accurately, and spot any mistakes early. I’ve found that a small table lamp or natural sunlight can make all the difference. Adding a daylight bulb is another simple way to brighten up your craft table, especially at night. If you enjoy detailed work, like beading or miniature painting, consider a magnifying lamp for extra clarity.
Safety Essentials
Even when you’re working with paper and glue, a first aid kit is handy to have around. And when power tools enter the mix, use protective gear and check that everything’s working right before starting up. Also, don’t forget about ventilation; if you’re using spray paint, strong adhesives, or anything with fumes, make sure windows are open or use a fan to circulate fresh air.
Leveling Up: DIY Crafting Tips for Better Results
Once you’re comfortable with the basics, you’ll want to push your creativity even further. There are a few habits that help your projects look more polished and professional as you keep going:
Test Out Techniques First: Try new paints, glues, or tools on scrap materials before launching into your main project. It’s a low-risk way to see how things will behave.
Stay Organized: Use trays, muffin tins, or little bowls to keep track of beads, buttons, or other small items while working. It keeps your space clean and your emotions in check.
Take Progress Photos: Snapping a few shots as you go both records the process and lets you spot anything that’s off before it’s too late; it’s also fun sharing the behind-the-scenes with friends.
Embrace Happy Accidents: Sometimes, a simple mistake leads to something uniquely eye-catching. Being flexible and open to changing your plan will keep DIY enjoyable, not stressful. Remember that a mistake isn’t always a failure; sometimes, it leads to your favorite result.
Prioritizing careful prep, good supplies, and patience takes any craft project from basic to awesome. That little bit of extra time goes a long way, so step up your commitment to the details and experiment every now and then.
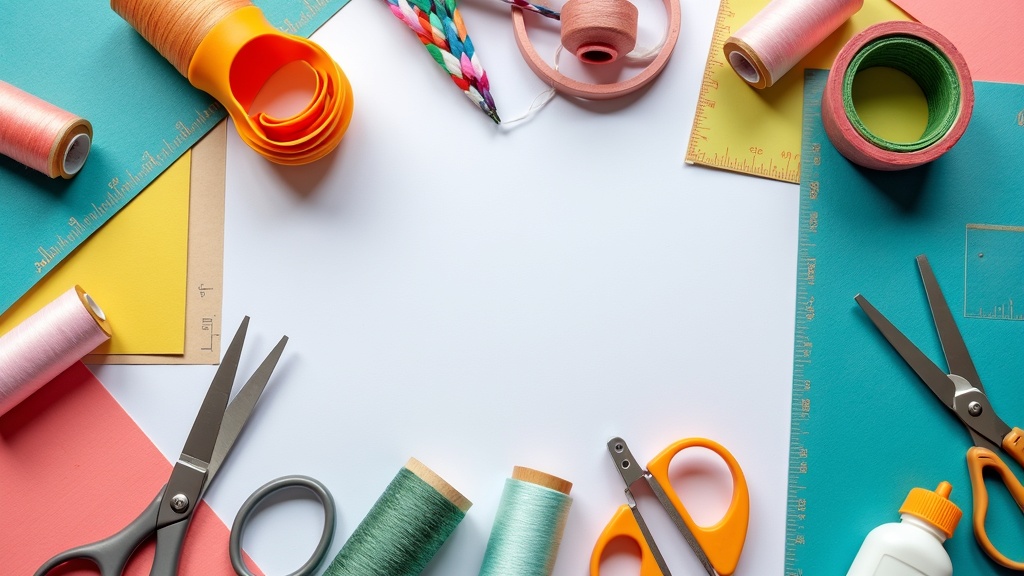
Recommended Tools for Beginner Crafters
The right supplies make every project run more smoothly. Here’s a starter shopping list I recommend for those just starting out:
- Scissors and Craft Knife: Get a sharp pair of scissors and a simple craft blade for cleaner cuts.
- Ruler or Measuring Tape: Vinyl tape measures are flexible and perfect for quick dimension checks.
- Basic Glues and Adhesives: White glue, craft glue, and a glue gun (with the right glue sticks for your material) cover almost any beginner project.
- Pencil and Eraser: For marking, sketching, and easy corrections.
- Paintbrushes and Sponges: Pick up a variety pack for all sorts of painting and staining days.
- Basic Safety Gear: Think gloves and, if you’re painting or sanding, a simple mask.
Adding just a few tools over time can make any project less frustrating. If you’re not sure what to buy, start with basic, multipurpose options— you’ll figure out your favorites as you get into more projects. Don’t worry about getting every specialty tool right away; the essentials will cover a ton of beginner crafts.
DIY Beginner FAQs
Here are a couple of questions I hear all the time from people at the start of their crafting adventures:
Question: Why do my projects never look as neat as the tutorials online?
Answer: It almost always comes down to the small details: prep work, measuring, letting finishes dry, and using the recommended tools. Even experienced crafters don’t get perfection every time. Your skills improve with each project.
Question: What should I do if I mess up in the middle of a project?
Answer: Don’t stress! Try to salvage what you can, or see if you can adapt the mistake into a new design. Taking a break and coming back with fresh eyes helps, too.
Question: Are expensive supplies really worth it?
Answer: For core tools like scissors and glue, higher quality is often well worth the price. For decor items, embellishments, and basics, feel free to mix in cheaper options, especially while learning.
Wrapping Up
Setting yourself up for success as a new DIY crafter doesn’t mean spending a ton or expecting every project to be Insta-perfect. Avoiding the common mistakes I’ve shared here helps your first projects come out looking sharp and keeps the experience fun and stress-free. Celebrate your progress and keep creating; every mistake is just a step towards your next handmade masterpiece! The sense of accomplishment you’ll feel when you complete your first few projects is for real, so don’t hold back—step up and let your creativity run wild!
I appreciate this post.
I’ve been into DIY crafting for a few years now, and I still catch myself making some of these “beginner” mistakes, especially skipping prep work because I’m so eager to see the finished piece. I’ve ruined more than one project by rushing the drying time! These tips are such a good reminder that the little details really do make the biggest difference.
I love how you framed mistakes as part of the creative process; it takes the pressure off and makes crafting more fun. Now I’m inspired to start a new weekend project and actually measure things properly this time.