Crafting is a pretty great way to express creativity, make useful items, or just unwind after a long day. If you’re just getting into crafting, you’re probably excited by the endless projects you can try; anything from simple paper crafts to more involved woodworking or sewing. But one thing that doesn’t always get the spotlight is how to keep yourself safe while you’re creating. Crafting can be fun and satisfying, but without a little know-how about safety, it’s easy to run into problems. I will break down the basics of crafting safety for anyone who’s starting out, sharing tips I’ve picked up that’ll have you crafting with confidence. Whether you’re building simple crafts with paper or taking on slightly trickier DIY adventures, safety helps you get the most out of every project.

Why Safety Is Really Important When Crafting
When folks think of crafting, the first things that come to mind are usually colorful yarn, pretty papers, or maybe a shiny glue gun—certainly not items that scream danger. But accidents can happen, especially when learning new techniques or handling unfamiliar tools. Even small injuries can quickly take the fun out of your new hobby. I learned that lesson after a little run-in with a hot glue gun. Those things are hotter than you might expect!
Taking some basic precautions can protect you from most crafting mishaps. It’s also a good way to build good habits that’ll stick with you as you tackle harder projects. Keeping safety in mind turns your workspace into a spot for creativity and relaxation, not for bandages and regrets. Even more, the right safety approach helps you make crafting time enjoyable for friends or family members who want to join in.
Setting Up Your Crafting Space for Safety
Before you get into your favorite project, taking a bit of time to set up a safe working space pays off in a big way. Here are some things to check before sitting down to craft:
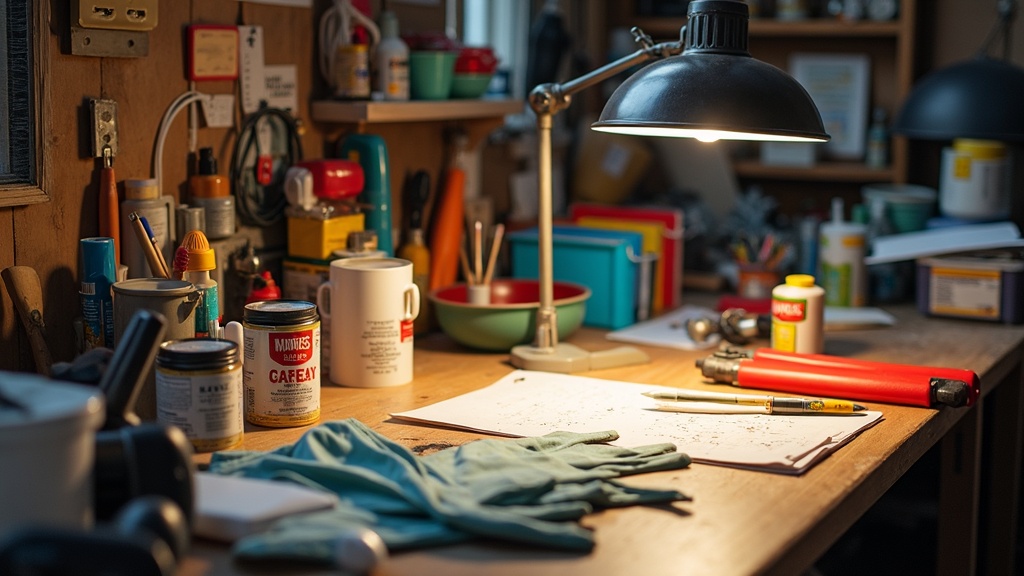
- Good Lighting: Make sure the area is well lit so you can clearly see what you’re doing. It helps you avoid accidental snips, burns, or glue mishaps. Lamps with adjustable arms can shine a light on your work, making every detail pop.
- Clear Workspace: Keep your table clean and organized. Extra clutter can send sharp tools flying or cause spills when you least expect it.
- Ventilation: If you’re using paints, glues, or anything that gives off fumes, crafting near a window or using a fan is a smart move. Inhaling craft fumes over hours can leave you with headaches or even more serious symptoms.
- Comfortable Chair: A comfy, stable chair keeps your posture in check, making longer crafting sessions a lot easier on your back and neck. If possible, pick one with good back support to help avoid aches.
Organizing your crafting area doesn’t require fancy setups; simple storage solutions like baskets or old jars can keep materials and tools easy to grab while keeping your work area clear.
Basic Safety Gear for Crafters
Some simple safety gear can give you peace of mind, and it doesn’t need to be expensive or fancy. Here’s a basic starter list I recommend:
- Protective Gloves: Really handy if you’re cutting, gluing, or working with certain chemicals. They’ll help save you from burns, cuts, or skin irritation, and they’re also helpful when using hot materials.
- Safety Glasses: If you’re hammering, sanding, or working with sharp tools, it just makes sense to protect your eyes. I’ve seen a single flying bead cause more trouble than you’d think, so having glasses nearby comes in handy.
- Apron or Old Clothes: Paints, dyes, and glues can stain fast. Keeping your good clothes safe helps you focus on the project, not on worrying about mystery marks or ruining your favorite shirt.
- First Aid Kit: Keeping bandages and antiseptic close by is one of those things you don’t know you need until you really do! Stock a kit with bandages, ointment, and some tweezers to handle the unexpected.
Common Crafting Hazards and How To Handle Them
Every type of crafting comes with a few hazards. Here’s a run down on what to watch for and how handle them in you crafting space:
Sharp Tools
Scissors, hobby knives, rotary cutters; they all do their jobs well, but they’re just as good at giving you a nasty cut. Always cut away from yourself, put tools down safely when not in use, and never leave blades where little kids or pets can reach them. I like to keep a magnetic strip or small case for stashing sharp tools between uses.
Hot Tools
Hot glue guns, embossing tools, and even small irons can reach burn-worthy temperatures. Giving tools plenty of time to cool down before putting them away, and making sure you avoid the metal parts, is always smart. Whenever I use a glue gun, I keep it on a heat resistant mat and unplug it right after I’m done. If you get burned, run the area under cool water right away and avoid popping any blisters. For larger burns, always seek proper care.
Fumes and Dust
Some glues, paints, and sprays can release strong fumes, and sanding or cutting materials can kick up dust. I always check labels and use these products in a well-aired space. Use a dust mask, especially if sanding wood or using spray paint.
Small Parts and Choking Hazards
Beads, buttons, and tiny embellishments should be kept out of reach of small children and pets. When working with a lot of small parts, I use divided trays and tidy up right after crafting. This habit pays off not only for safety, but also keep supplies sorted for next time.
Best Practices for Beginner Crafters
A few easy habits I’ve found that can help keep projects stress-free and make crafting safer:
- Read Instructions First: Whether you’re assembling a kit or watching a YouTube tutorial, give the directions a look before starting. This avoids doing steps out of order, which occasionally leads to frustration or even accidents.
- Test New Tools Slowly: When I get a new knife, glue gun, or fancy punch, I always do a few practice runs. Feeling out how a tool works avoids surprises on your real project and lets you get a sense of what it’s like to use.
- Supervise Young Crafters: If you’re crafting with kids or teens, keep an eye on the sharp tools, glues, and hot items. Sometimes, it makes sense to give them their own age-appropriate materials instead, making for a smoother experience for everyone.
- Take Breaks: Sitting still or hunching over tiny projects for hours gets uncomfortable. I make it a habit to stand up, stretch, and give my eyes a break every so often. I use a timer to help remind me to take breaks. Your focus and creativity improves when you’re comfortable.
- Stay Hydrated: It’s surprising how easy it is to forget to drink water during creative sessions. Staying hydrated helps you stay alert and cuts down on fatigue.
How to Choose Safe Crafting Materials
The supplies you pick can seriously impact how safe your crafting experience is. Here’s what I look for when stocking up on craft goodies:
- Check for Nontoxic Labels: Many craft paints, glues, and markers come in nontoxic varieties, which are safer for everyone, especially kids and pets. Pay attention to warning labels and ingredient lists before you bring new supplies home. Brands that list safety certifications offer extra reassurance.
- Keep Flammable Stuff Separate: Some paints, sprays, and glues are flammable. I stash them in a separate spot away from heat sources, including open flames, just to play it safe. Containers should always be tightly shut after use to avoid accidental spills.
- Buy Quality Tools: Extra cheap tools can sometimes break during a project, sending sharp pieces flying. Spending a little more on tools from brands you trust is worth it for both safety and longevity. Over time, you’ll save money by not having to replace broken items constantly.
Frequently Asked Questions
Here are a few questions beginner crafters often ask about staying safe while working on projects:
Question: Do I really need gloves or safety glasses for simple crafts?
Answer: For most crafts that don’t use hot tools or sharp blades, you might not need them. But if you’re cutting, gluing, sanding, or using anything that could splash or splinter, wearing gloves and glasses is a smart choice. Protective gear doesn’t take much time and can save you from pain later.
Question: How can I keep my craft area organized without spending a fortune?
Answer: Old jars, boxes, and muffin tins make great organizers for holding small supplies. Keep sharp or hot items out of reach, label storage, and create specific spots for each tool so things don’t get lost or accidentally grabbed when they’re not supposed to be. Simple shelves or hooks can really help keep things tidy.
Question: What should I do if I get a small cut or burn while crafting?
Answer: Rinse cuts with water, apply antiseptic, and put on a bandage. For burns, cool the area under cold running water for several minutes. If the injury is deeper, doesn’t stop bleeding, or gets worse over a day or two, see a doctor for professional care. It’s always better to treat small injuries early so they heal fast.
Cool Craft Ideas That Stick to Safety Basics
Safe crafting isn’t about limiting your creativity. There are plenty of fun projects that use mild materials and give you plenty of room to experiment. Here are a few ideas I think are perfect for getting started safely:
- Papercrafts: Origami, card making, and simple scrapbooking use mostly just scissors and glue, so they’re low risk but packed with creative potential.
- Simple Sewing: Start with a basic hand sewing kit; there’s no need for heavy duty machines or sharp rotary cutters right away. Beginner hand sewing projects teach you good habits, too!
- Painting: Watercolors and acrylics labeled as nontoxic let you experiment with color without worrying about fumes or harsh cleanup.
- Jewelry Making with Beads and String: Stringing beads or making friendship bracelets can be creative and doesn’t require much in the way of tools or safety gear, making it a great group activity.
Safe crafting also means clean up. Always wash your hands after working, put tools away, and wipe down surfaces, especially before eating or touching your face. These small steps makes starting your next craft session even smoother.
Final Thoughts
Remember the phrase: Safety First. Learning a few safety basics early on means you can enjoy your new hobby without stress. Keeping your space organized, using the right tools, and being aware of possible hazards are simple changes that can make a world of difference in crafting. I’ve found that approaching each project with safety in mind gives me the peace to focus fully on creating something eye-catching, and keeps my hands ready for whatever project comes next. Happy crafting!

I’m a little bit of a crafter myself, nothing crazy or too consistent, but I like to dabble here and there. I always read instructions and test out new tools, but what I hadn’t considered as seriously were the implications of sitting/souching for long periods or the potential toxicity of certain materials, ingredients, etc.
This is a great guide for those new to crafting or wanting to get into it. “Crafting” doesn’t automatically scream danger most of the time, but I guess it certainly can if you’re not careful. Great post, I’m going to save for future referencing for sure!
Steph, thank you for sharing your experience with crafting.