If you’ve ever looked at a craft kit and thought, “I wish this had a little more personality,” you’re not alone. Craft kits make super fun gifts for all ages, but a little customization can seriously take the whole experience up a notch. I will break down steps and ideas to create one-of-a-kind craft kit gifts that will feel thoughtful and personal for the recipient.
Why Personalize a Craft Kit for Gifting?
Personalizing a craft kit adds a real sense of care and creativity to your gift. Store-bought kits are easy, but sometimes feel generic. Taking the extra time to add custom elements shows you’ve put real thought into the gift, whether you’re making something for a friend’s birthday, a holiday, or just as a surprise pick-me-up.
Studies show that personalized gifts feel more meaningful to the people receiving them. Rather than handing someone the same kit they could buy at any store, you’re saying, “I know your style and what makes you smile.” That goes a long way, especially with creative friends or kids who love crafting!
Choosing the Right Craft Kit Base
Picking a craft kit to personalize is the first step. Craft kits come in all shapes and sizes—think jewelry making, painting, embroidery, slime making, or paper crafts. I usually start by thinking about the person who’ll get the gift. Are they into fashion? Grab a friendship bracelet kit. Do they love home decor? Pick out a candle or soap making set. These small details make a huge difference and make the present truly unique.
Here’s what to look for in a good craft kit to personalize:
- Quality Supplies: Make sure the kit has sturdy, workable materials. Flimsy parts aren’t much fun for anyone and can make the project frustrating.
- Room for Customization: Check for extras like blank pieces, open-ended designs, or the option to add extra accessories.
- Age Appropriateness: Kits should be safe and suitable for the person’s skill level. Younger kids benefit from simpler steps and nontoxic supplies.
Some brands even offer “blank slate” kits meant for customizing, which are pretty handy if you want more freedom with your design and creative expression.
Ideas for Customizing Craft Kits
Personalizing a craft kit can mean a lot of things. You can tweak the packaging, add bonus supplies, or toss in a handwritten note. Here are some easy ways to add that special touch:
- Swap Out Colors: Replace standard items (like yarn or paper) with colors you know your giftee loves. For example, if your recipient likes bold colors, swap out the pastel yarn with something more vibrant.
- Add Extra Trinkets: Throw in unique beads, charms, stickers, or patterned fabric scraps. Small upgrades can spark big inspiration and make the kit feel even more special.
- Include Samples: Add little inspiration samples—a completed friendship bracelet or a painted rock—to show ideas and help the recipient get started. It breaks the ice and encourages creativity right away.
- Upgrade Tools: If the kit includes basic tools, consider adding an upgrade; tiny scissors, a nice glue stick, or a fancier brush. Quality tools make crafting way more fun.
- Mix & Match: Combine themes you know the person enjoys. For example, mash up a painting kit with stencils based on their favorite animals or hobbies for a more personalized touch.
Adding a personalized instruction or tip card is also a nice move, especially for beginners who might need an extra nudge or some creative ideas. Handwritten tips can build confidence and inspire new project ideas.
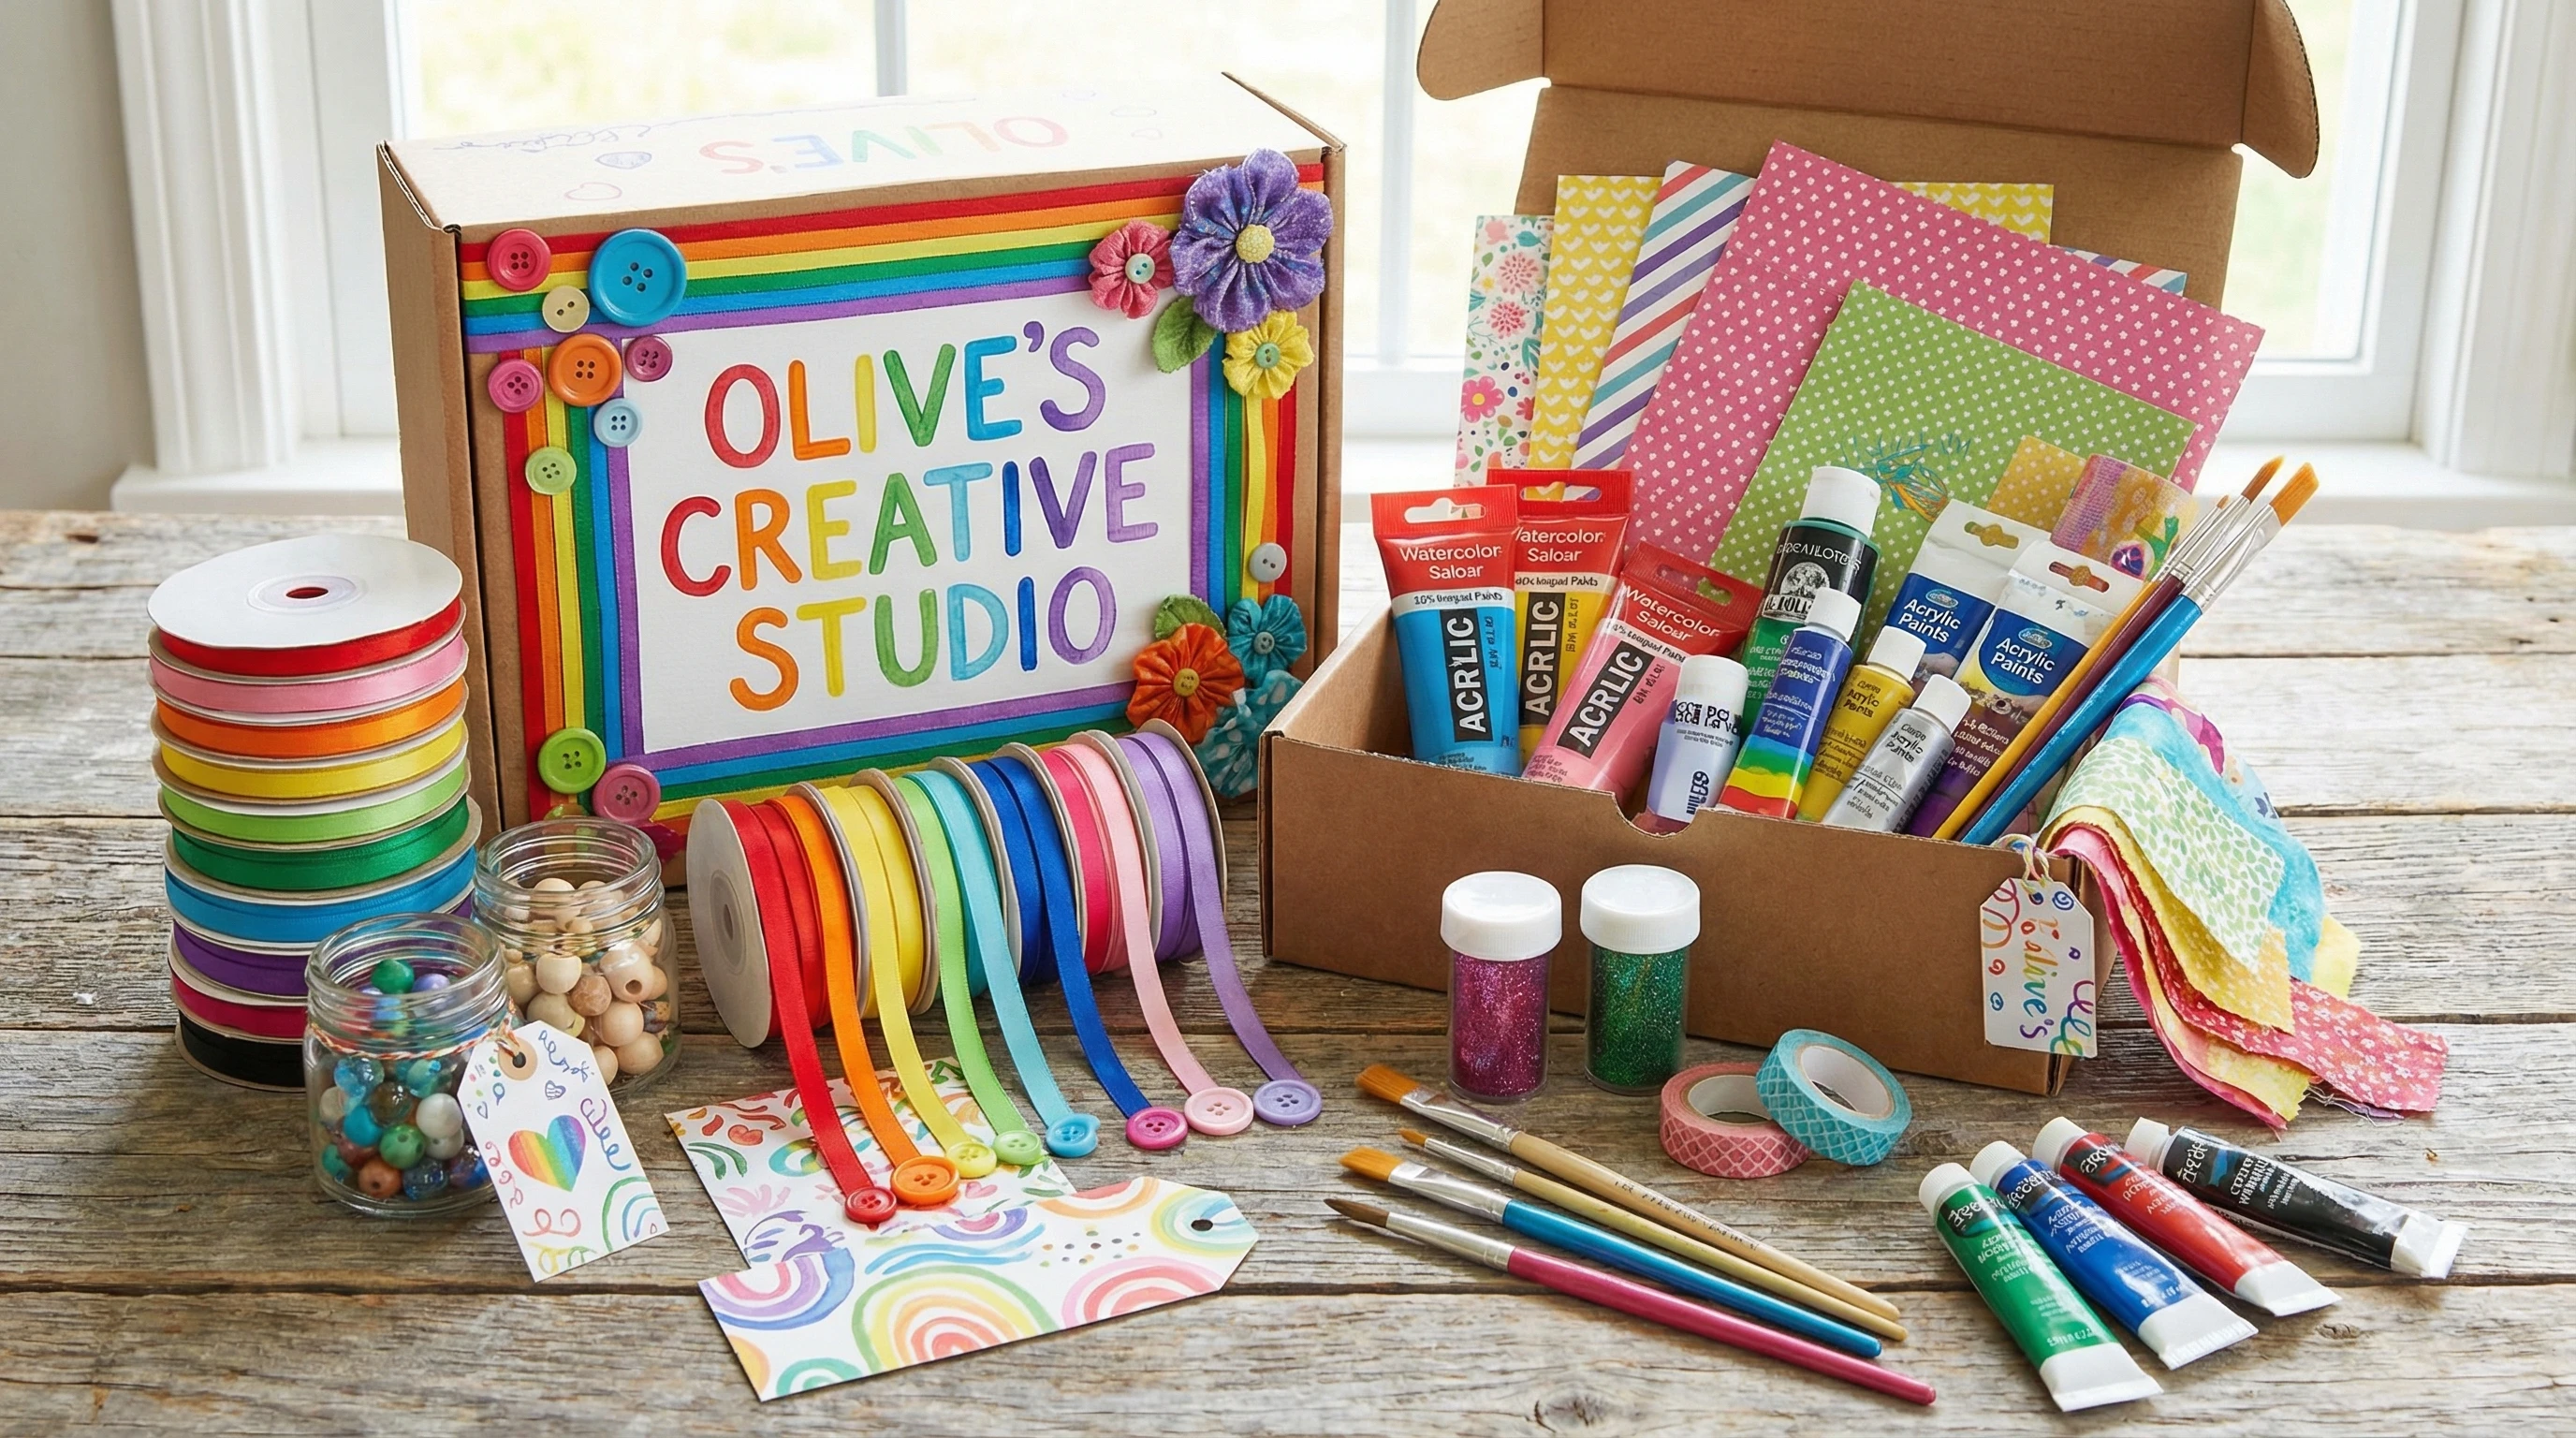
Creative Packaging Touches
The packaging is often the first thing the recipient sees, so it’s worth giving it some extra attention. Even the fanciest kits look more special with a creative twist:
- Decorate the Box: Use washi tape, stickers, markers, or fun stamps to deck out the box or bag. Bright, cheerful decorations go a long way.
- Personalized Tags: Attach a homemade tag with the recipient’s name, a quote, or even a silly doodle to bring a smile to their face.
- Reusable Bags: Consider storing the kit in a cute tote or drawstring bag instead of a cardboard box. It adds an ecofriendly touch, and they can reuse it later for storage or another craft project.
- Layer with Tissue or Confetti: Use colorful tissue or confetti to add some wow factor when they open the box. This makes the unboxing feel like an event in itself.
- Seal with a Custom Sticker: Print or create a sticker with their name or a simple message like “Happy Crafting!” to finish off the kit in style.
I find that even a little effort decorating the outside helps build excitement before the recipient even gets to the good stuff inside. Presentation matters—it’s the first peek at the fun to come!
Practical Tips for Putting Kits Together
Certain steps can make the whole assembly process smoother, especially if you’re putting together several kits at once for an event or party favors. Here’s what’s worked for me over the years:
- Lay out all your supplies and do a quick inventory. This way you won’t discover you’re out of ribbon halfway through.
- Use small bags or boxes within the kit to organize materials, like beads in snack bags, colored pencils rolled in paper, or felt sheets stacked neatly so everything stays neat and easy to find.
- Add a simple DIY instruction sheet. Even just a few handwritten steps or tips make a big difference, especially for trickier crafts. You might want to include a photo for trickier steps.
- If shipping, pack things with bubble wrap or extra tissue to avoid crushed supplies and disappointed faces.
A checklist for each kit can be pretty handy if you’re prepping more than one. That way, every gift gets the same amount of care and nothing gets left out. Plus, a checklist makes future kits easier to make.
Things to Consider Before Gifting a Personalized Craft Kit
Personalizing is fun, but you want the end result to be practical and safe. Here are some things I keep in mind—
- Allergies & Sensitivities: Check if your recipient has material allergies (latex, certain glues, scented markers) or skin sensitivities. There are plenty of hypoallergenic alternatives worth tracking down.
- Cleanup: Consider how messy the kit is. Parents of young kids will appreciate mini aprons or tablecloths thrown in, or at least a heads up in your note so they can be ready for cleanup.
- Instructions Clarity: If you’re adding new materials, jot down simple tips or links to tutorials. YouTube is filled with craft “how-to” that you can recommend for extra help.
- Recipient’s Interests: If in doubt, ask their close friends or family for input. That one extra step can help avoid crafting duds and boost the wow factor.
Sometimes I tuck in a gift card for extra supplies, so the recipient can pick up anything else they’re curious about. That little bonus lets them choose their own add-ons and expands the possibilities of the gifted kit.
Advanced Personalization: Going the Extra Mile
For those who like to really wow with their gifting game, there are a few ways to add an extra layer of thoughtfulness. Think about what will make your recipient gasp with delight—
Include a Finished Example: Make a sample creation from the kit’s materials; even a simple keychain or bookmark can help them picture what’s possible and inspire their creativity.
Theme Kits by Event or Season: Adjust the colors or styles to reflect seasonal holidays or major milestones, such as graduation cap bookmarks, winter-themed candle colors, or summer-inspired painting palettes.
Incorporate Personal Messages: Tuck in a handwritten letter, a doodle, or even a playlist QR code related to the kit’s theme for a special touch no one else will think of.
Bundle with Snacks: Add a few wrapped treats or hot cocoa packs for longer crafting sessions. Just be sure any snacks are allergy-friendly so everyone can safely enjoy them.
Going a little over the top can make birthdays, teacher gifts, or just-because presents feel extra memorable and show just how much you care about their happiness.
Frequently Asked Questions
Here are some quick answers to common questions about personalizing craft kits for gifts:
How do I choose the right craft kit?
Pick something based on your recipient’s interests and skill level. If they’re just starting out, grab a kit with simple, clear instructions and fewer pieces; advanced crafters might love something with a broader range of options.
Can I personalize prepackaged kits?
Yes! You can always swap out supplies, upgrade tools, and jazz up the packaging even if you start with a store bought set. Don’t be afraid to add your own twist.
What if I want to make a kit from scratch?
Just gather themed supplies, pop them in a cute container, and add a DIY instructions card. Homemade kits stand out and leave more room for creativity and personal expression.
How do I make sure my kit is safe?
Double-check all materials for age-appropriateness and potential allergies. Stick with nontoxic, washable things for little kids to keep things safe and fun.
Personalized Craft Kits as Meaningful, Affordable Gifts
Gift-giving doesn’t need to be expensive or complicated. A bit of effort choosing, customizing, and packaging a craft kit creates a truly memorable present that stands out from the usual store bought options. Plus, crafting itself is a gift; it offers a creative break, a screen-free activity, and even a little stress relief. Whether you’re making something for a friend, a family member, or a party favor, personal touches turn ordinary crafts into thoughtful treasures. Happy crafting!